Tuesday 27 November 2012

Oreo Cheesecake Brownies


 If you dont try to make these, you are CRAZY! There are so many different brownie recipes, the opportunities are endless.  Though you cant exactly go wrong with any of them, i highly recommend this on in particular. I was looking at foodporndaily.com and found this fancy brownie recipe. This flavor combination stood out to me the most because im such a cheesecake person as you can probably tell from the last post. Plus, cooking with oreas is the best because you dont need to use them all in the recipe so you get to eat the rest!! Most oreo cheesecake brownie recipes mixed the oreos right into the brownie batter and then swirled the cheesecake mixture on top. However in these pictures you can really see the distinct layers, I like it better that way! So try it out and enjoy, I guarantee you will be satisfied!

Ingredients:
  • 1 batch of your favorite brownie batter (8×8 pan size)
  • 1 pkg (8 oz) cream cheese, softened
  • 3/4 cup confectioners’ sugar
  • 1 tsp vanilla extract
  • ~2 C coarsely chopped Oreo cookies
Instructions
  1. Preheat the oven to 350 F. Line an 8×8 baking pan with aluminum foil, leaving a slight overhang on both ends for easy removal. Butter the aluminum foil.
  2. In medium bowl, beat together cream cheese, confectioners’ sugar and vanilla extract until smooth. Scoop the mixture into a plastic bag and snip off a corner, then set it aside.
  3. Spread half of the prepared brownie batter into the baking dish, and top with the chopped oreos. Press the big pieces into the batter. Pipe the cream cheese mixture on the top of the oreos in a zigzag, then use a spatula to smooth out the cream cheese mixture into an even layer.
  4. Distribute the remaining brownie mixture in several dollops over the cheesecake layer and spread evenly. (You can also pipe this on top if you’d like)
  5. Bake for 28-35 minutes, or until a toothpick inserted along the outside should come out clean, but near the center a few moist crumbs is just fine. At this point, remove from the oven and let it cool completely on a cooling rack before lifting the foil out of the pan. 


Bon Appetite!

Monday 19 November 2012

Mini Raspberry Swirl Cheescake


For those cheesecake fans out there, here is a heavenly recipe that I guarantee will excite your tastebuds. This recipe has been very popular and successful among my friends, and of course myself. Raspberry flavoured cheesecake is my favorite, but of course, you are able to substitute the raspberries for another fruit, perhaps blueberries or strawberries, in order to better meet yourself. Try it out! You dont be disappointed!

Ingredients:

  • 1 1/2 cups graham cracker crumbs (Blend/process graham crackers to create these)
  • 3 tbsp. granulated sugar
  • 4 tbsp. unsalted butter, meltedTopping
  • 6 oz. raspberries
  • 2 tbsp. granulated sugarFilling
  • 2 lbs. cream cheese, room temperature
  • 1 1/2 cups granulated sugar
  • pinch of salt
  • 1 tsp. vanilla extract
  • 4 eggs, room temperature.

Preparation:


  1. Line muffin/cupcake pans with paper liners. Preheat oven to 325 degrees.
  2. In a small bowl combine graham crumbs, sugar, and melted butter. Blend together with a fork.
  3. Press 1 tbsp. of graham cracker mixture into the bottom of each liner (using the bottom of a small cup helps press them down).
  4. Bake until set-about 5 minutes.
  5. Transfer pan(s) to cooling rack.
  6. Puree raspberries and sugar in a blender/food processor until smooth. Strain the raspberry mixture through a fine mesh sieve (Boy was that a pain!)
  7. In a large bowl beat the cream cheese with an electric mixer on medium-high speed until fluffy.
  8. Blend in sugar until smooth.
  9. Beat in salt and vanilla.
  10. Beat in the eggs, 1 at a time, making sure they are fully incorporated before adding the next egg.
  11. Spoon 3 tbsp. filling into each crust.
  12. Dot 1/2 tsp. of raspberry puree on top of the filling on each little cake. Use a toothpick to swirl and create a marbled effect. 
  13. Fill a large cookie sheet with water, place a muffin tin on the sheet, so it is partially submerged in the water (giving it a "water bath"-this will help prevent sinking and/or cracking). 
  14. Bake 11 minutes.
  15. Rotate pan(s).
  16. Bake another 11 minutes, or until set (they may look puffed, but they'll go back down).
  17. Transfer to a wire rack and cool to room temperature.
  18. Chill in the refrigerator for at least 4 hours before serving.
  19. Store any extra or leftover cheesecakes in the refrigerator.
Bon Appetite!

Tuesday 30 October 2012

Creepy Mini Spider Cupcakes

Halloween is an ongoing, week-long celebration. The more treats the better! I found a recipe for these creepy looking spider cupcakes. Even though I am EXTREMELY afraid of spiders, I thought these cupcakes were pretty cool. These mutant spiders are mini cupcakes with black sugar. Their eyes are cinnamon candy, they have marshmallow fans, and black licorice legs.


 Ingredients 
  • 2 cups all-purpose flour
    2 cups sugar
    1/2 cup cocoa powder
    2 teaspoons  baking soda
    1 teaspoon baking powder
    1/2 teaspoon salt
    1 cup vegetable oil
    2 eggs
    2 cups buttermilk 
  • Decoration:
    Black sanding sugar
    1 bag cinammon candy
    1 bag marshmallows
    1 bag black licorice
    Black sanding sugar

Directions

1. Preheat oven to 350 degrees (180 degrees Celsius). In mixer, on low speed, mix together dry ingredients (flour, sugar, cocoa powder, baking soda, baking powder, and salt).
2. Add oil, eggs, buttermilk and vanilla. Increase speed and beat for 2 minutes, until well combined. Spoon into 20 paper-lined muffin cups, filling halfway.
3. Bake for about 25 minutes or until tops are firm and tester comes out clean. Transfer to rack and cool completely.
4. Ice mini cupcakes with vanilla buttercream and coat icing with black sanding sugar. Use cinnamon candy for eyes, 8 pieces of black licorice for legs, cut out tiny shapes from marshmallows for fangs. Attach it all.
5. VOILA, you got yourself creepy spider cupcakes!

Bon Appetite!

Monday 22 October 2012

Pillsbury Ready-to-Bake Pumpkin Cookies


My roommate and I usually prefer to bake our desserts from scratch. HOWEVER, come Halloween, there are cookies that we cannot resist. We wait all year round for 'Pillsbury Ready to Bake Pumpkin Cookies'. They remind me of my  childhood because my parents only allowed me to bake these kinds of cookies (I would make too much of a mess baking cookies from scratch). My roommate and I anxiously awaited for the dep by our apartment to begin selling the rolls of these Pillsbury Pumpkin Cookies. 
The process for baking can be summed into 6 simple steps: 1. Unwrap the packaging and preheat the oven to 350F, 2. Slice the cookies (not too thin but not too thick), 3. Place them on a cookie sheet (leave a little room between them), 4. Place them in the oven (once it has been preheated) for 8-10 minutes,  5. Leave them to cool, and finally 6. EAT THEM! 
To say these cookies are DELICIOUS is an extreme understatement. They are  easy to make and require very little clean-up!  Its a no brainer! Hit up the grocery store or dep nearest you and get into the Halloween mood. Plus, they make for a great study-snack. 
Bon Appetite! 

Thursday 11 October 2012

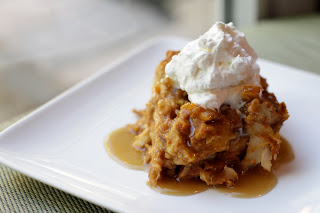
Pumpkin, Apple & Cinnamon Raisin Bread Pudding with Caramel Sauce and Whipped Cream Topping

In spirit of the Thanksgiving celebrations this past weekend, my roommate and I decided tried out a new pumpkin recipe. Instead of the traditional Pumpkin Pie, we decided to make Pumpkin, Apple & Cinnamon Raisin Bread Pudding with Caramel Sauce and Whipped Cream Topping. What a great decision it was, we finished the entire pudding between the two of us in under an hour. In order to make this dessert properly, we found a video to make the process a lot easier. Take a look! I know thanksgiving has past, but whats wrong with eating pumpkin desserts all year round!? Yolo right? 


Join Danny and DJ's videos on YouTube. They kick off the second season with this very special pumpkin dessert...as they call it a "Oooey goooey bread pudding filled with the flavours of Fall -- pumpkin, apple, cinnamon and raisins and toped with homemade caramel sauce and freshly made whipped cream." If you enjoy this video, I guarantee you will enjoy the rest of their recipes as well. 

Bon Appetite!  

Sunday 30 September 2012

peanut butter & banana ice cream sandwiches

For my good friend Eric Barsky's birthday, his mother sent him a package of her infamous  "BarskyMommas". They consist of two chocolate cookies topped with caramel syrup, and are stuck together by vanilla icing. I was inspired to try and find a similar recipe, but one that also accommodated both mine and my roomates obsession with peanut butter. I stumbled upon a picture of miniature ice cream sandwiches resembling the look of the "BarskyMommas." My roommate and I decided to try out this recipe and found them super easy to make. Though nothing will compare to the delicious "BarskyMommas," I would say they were a close second! 


ingredients:

- 3 1/2 cups of banana ice cream- 40 small peanut butter cookies
- 1 cup of chocolate chips
- 1/4 teaspoon of espresso powder
- flaky salt for sprinkling 


method:

Place half the cookies face down on a baking sheet. Top each with a large spoonful of ice cream, and then another cookie. Put the pan  into the freezer for about 30 minutes to set the ice cream.

Meanwhile, melt the chocolate. Put half the chips in a bowl and microwave in 30 second intervals, stirring after each, until melted. Stir in the other half of the chocolate until melted, then stir in the espresso powder. Transfer the chocolate into a plastic bag. 

When the sandwiches have set, snip a tiny bit off one corner of the plastic bag. Working a few sandwiches at a time, drizzle them with chocolate and sprinkle with the salt. It's important to alternate these two tasks, otherwise the chocolate will start to freeze onto the cookies and the salt wont stick to it. Put the sandwiches back into the freezer for 30 minutes or so for the ice cream  to set fully.


Bon Appetite!